How To Retouch Image In Photoshop
Contents
How To Retouch Image In Photoshop
High-End Jewelry Retouching / Model Retouching / Product Retouching
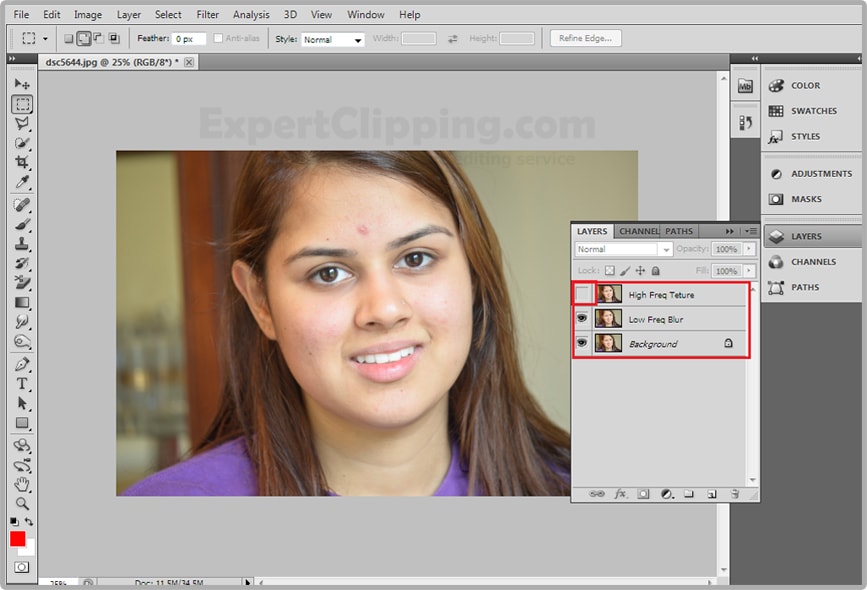
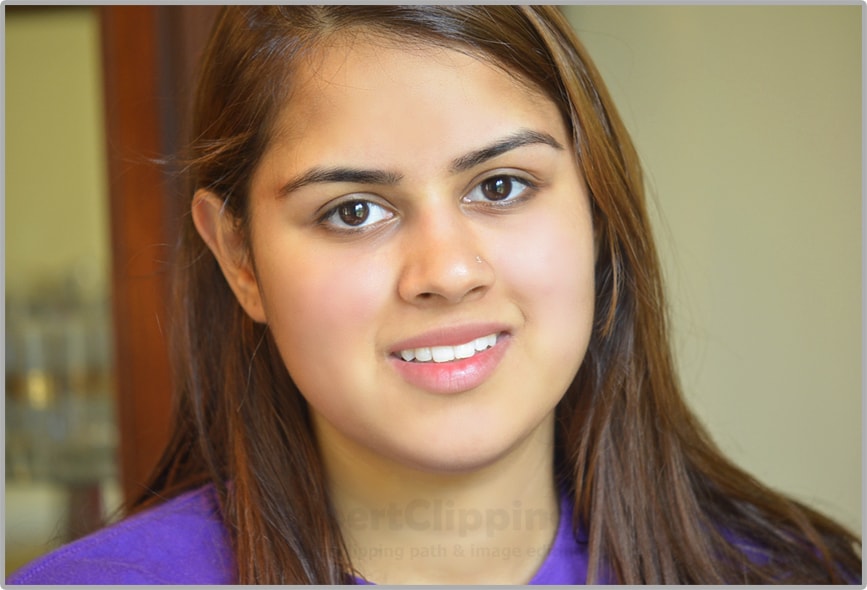
Open a photo of a face that you’d like to retouch. The First step is to make 2 copies of the photo by pressing ctrl+j twice on the layer.
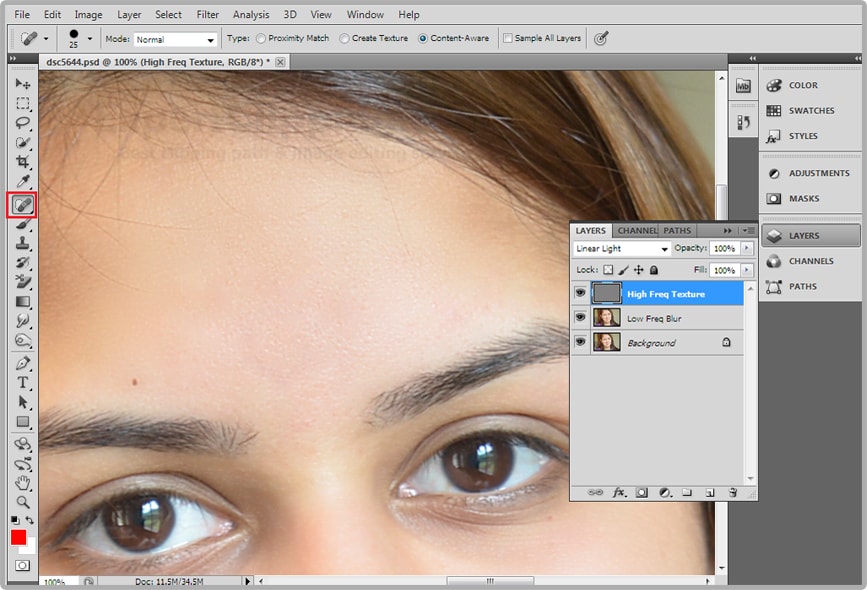
I create two layer is high frequency texture and low frequency blur, click off the eyeball next to the top layer to temporarily hide it.
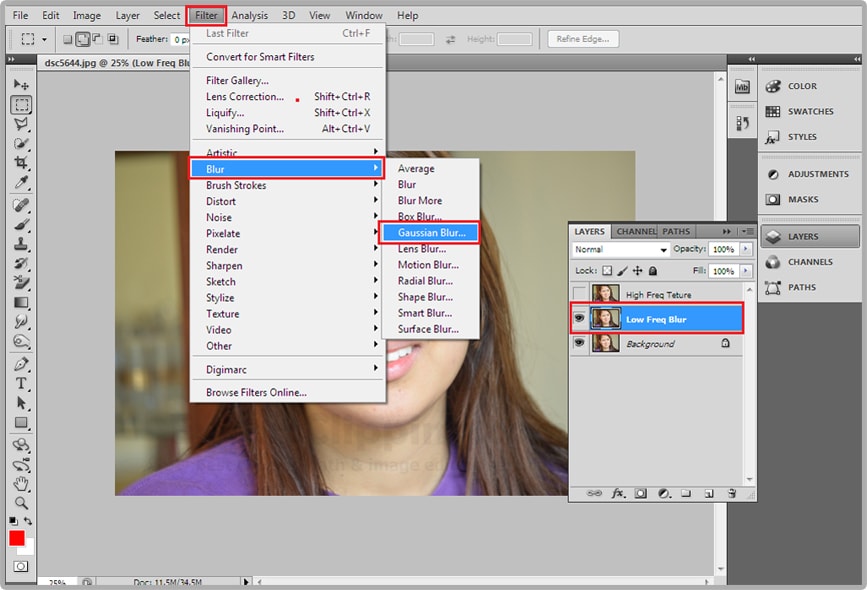
And go to Filter>Blur>Gaussian Blur.
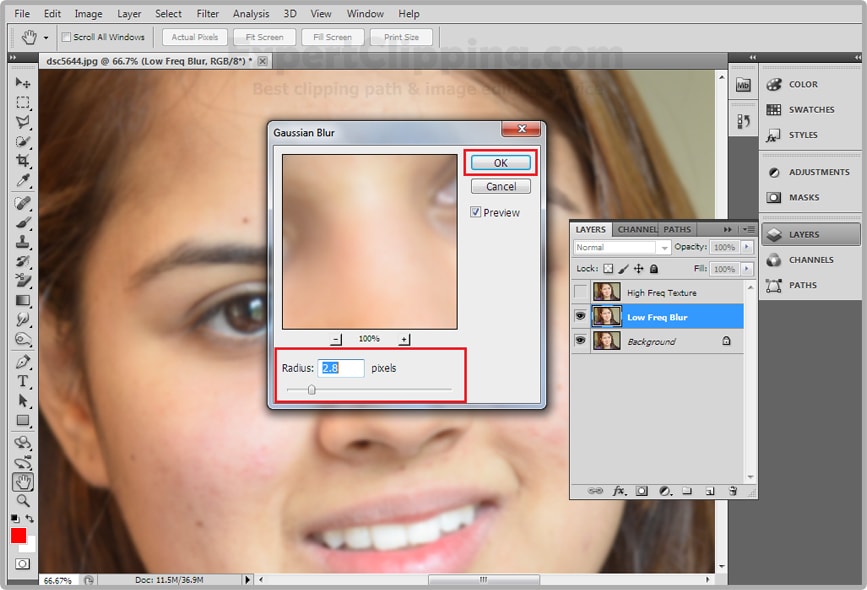
Drag the slider until it blurs the skin just enough to hide most pores and bitchiness then click OK.
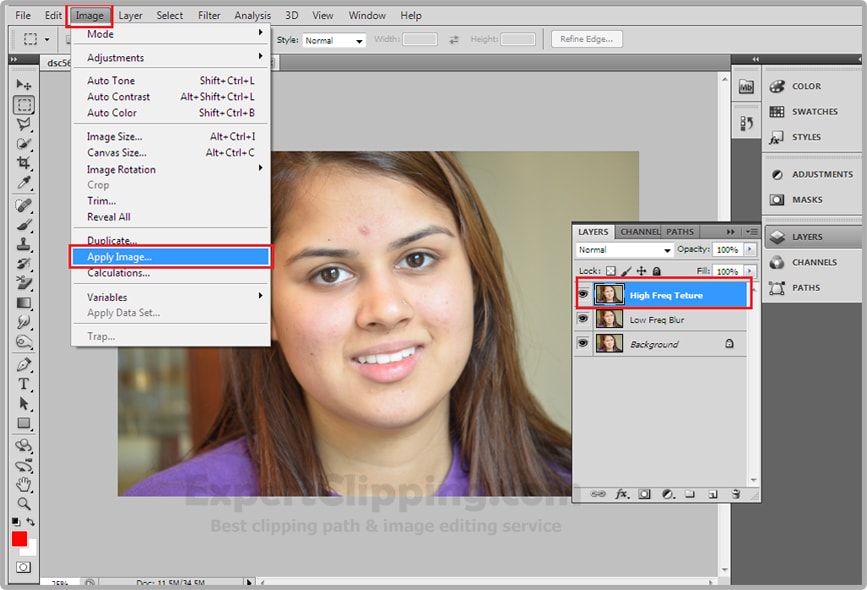
Make the top layer visible and active. Go to Image and apply image.
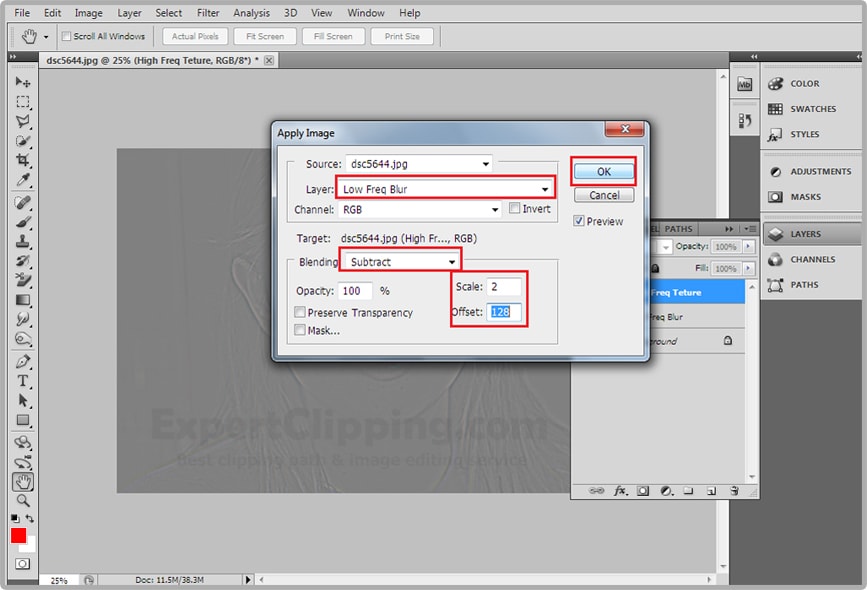
For the source layer, click “ Low Freq Blur” and for the Target Blending mode click “Subtract” The Scale is 2 and Offset is 128. Then click OK.
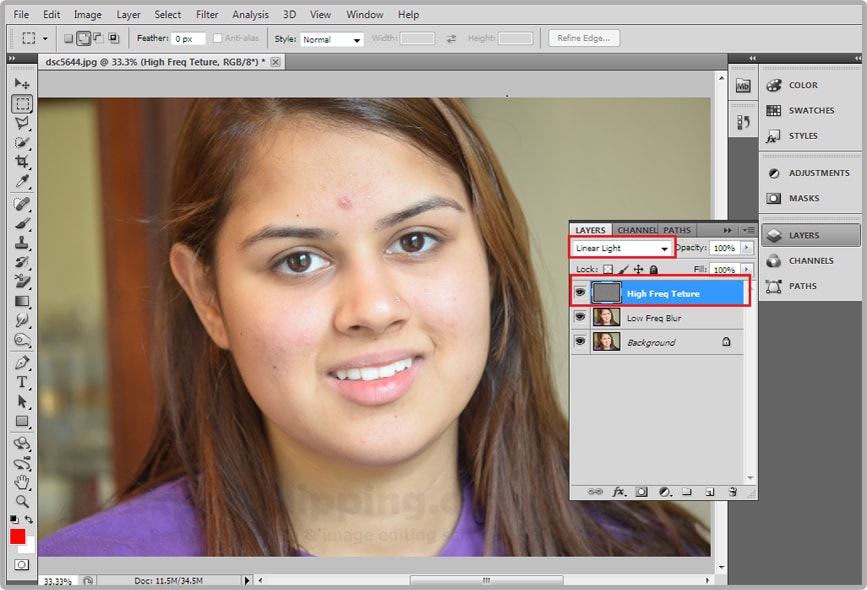
Change the Blend mode to Linear Light at this point your photo looking the same as before.
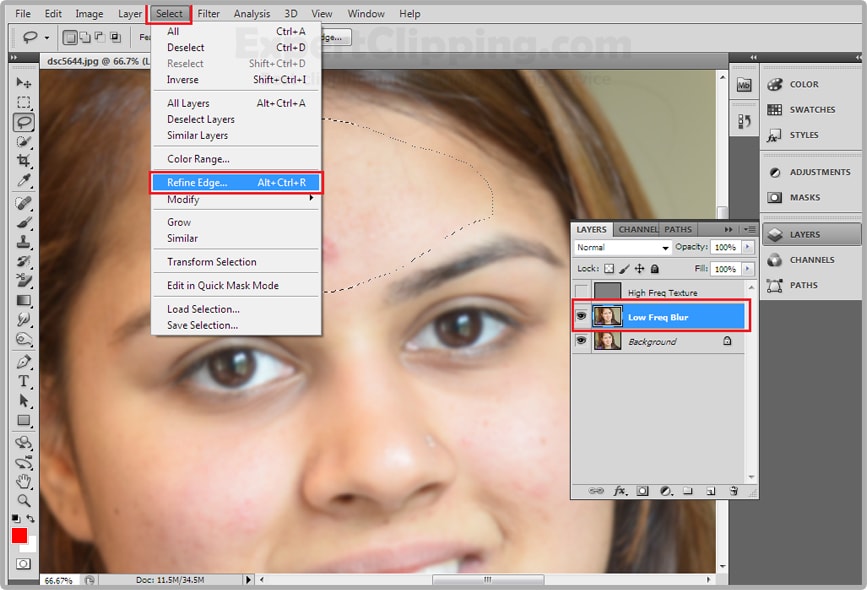
Make the middle layer active. Zoom into areas of the face by pressing “z” to open your zoom tool and drag it over the place.
Open you lasso tool and draw the selection over the inside of your skin. You’ll feather it, so edges will be soft. For you, the best way to preview the feathering is the click the Refine Edge button or go to Select and Refine Edge.
Drag the Feather slider to the right, until it’s blurred approximately this much. The actual pixel amount of yours, may be very different than mine depending on your photos size and resolution. Remember your pixel amount and click Cancel. 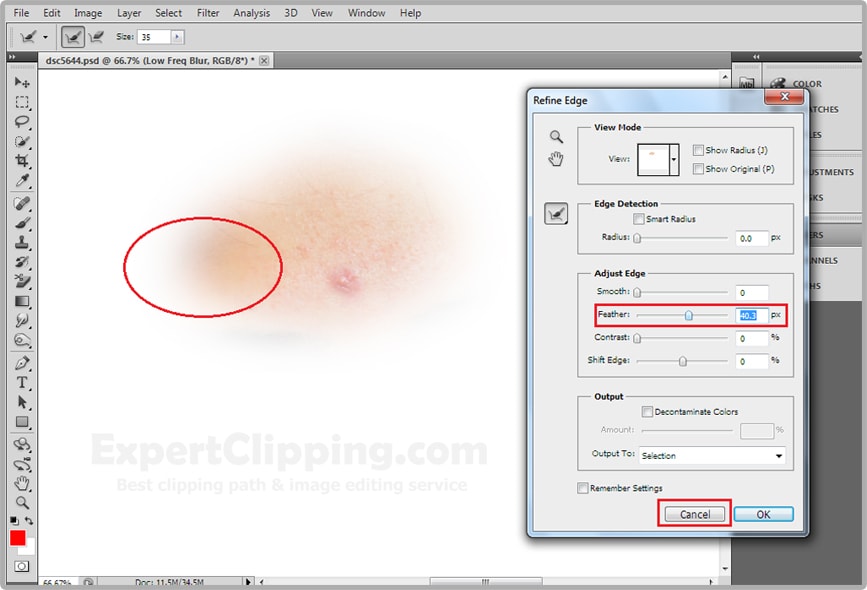
At the top, in the feather field, type in that amount.
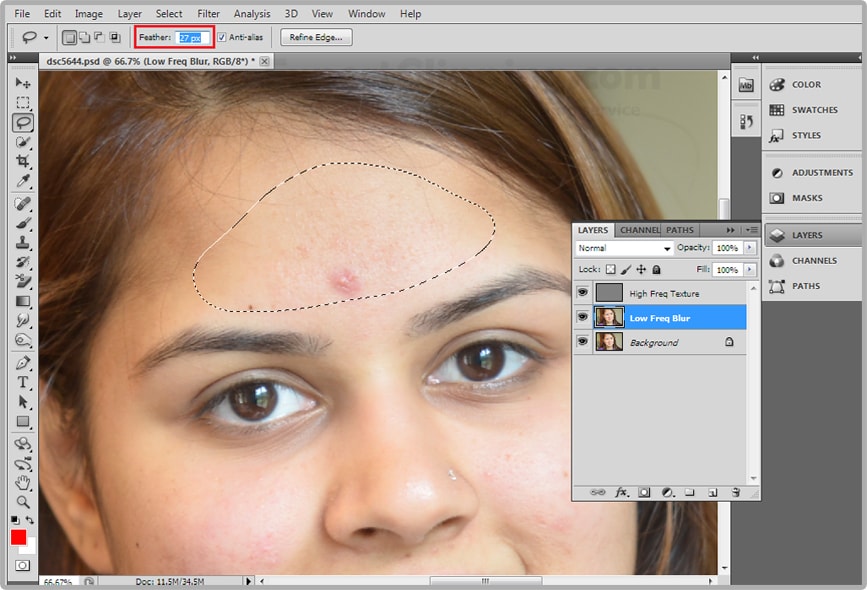
Deselect it by pressing Ctrl+D. To apply the Feathering draw another selection inside the skin. And go to Filter, Blur and Gaussian Blur. Slide the blur Radius to an amount that makes the bitchiness disappear. The texture remains because it’s on a different layer Click OK.

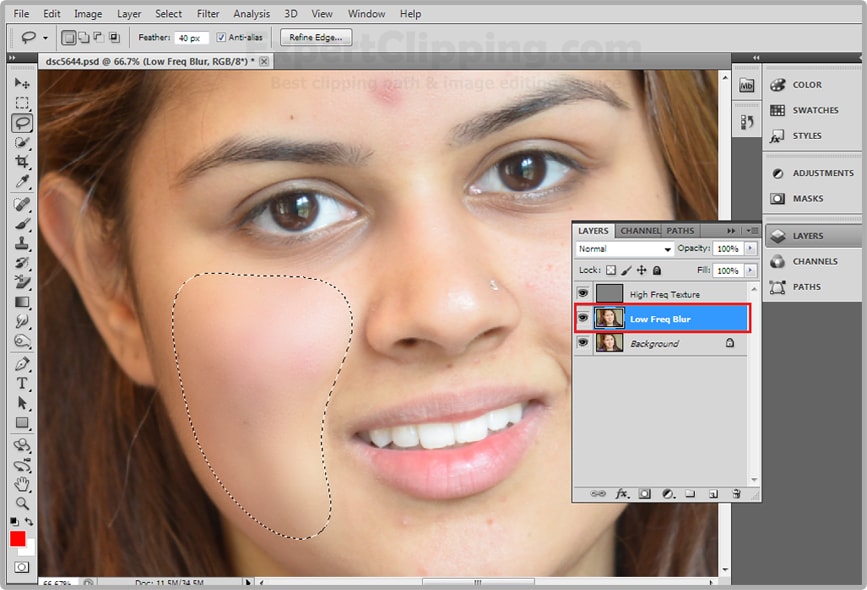
Now you’re just concerned with removing the bitchiness and overall inconsistencies.
Draw another selection around the cheek and make sure you don’t get too close to the eyes, hair, lips and neck. Press Ctrl+F to repeat the last filter you used, which was Gaussian Blur. the delete the selection.
If you want to finesse it more by removing tiny spots of texture imperfections, zoom into the area you want to finesse the area by pressing Ctrl Plus key and drag your subject to the area you want to finesse. Make your High Freq texture active again and this time you’ll open your “Spot Healing Brush Tool”
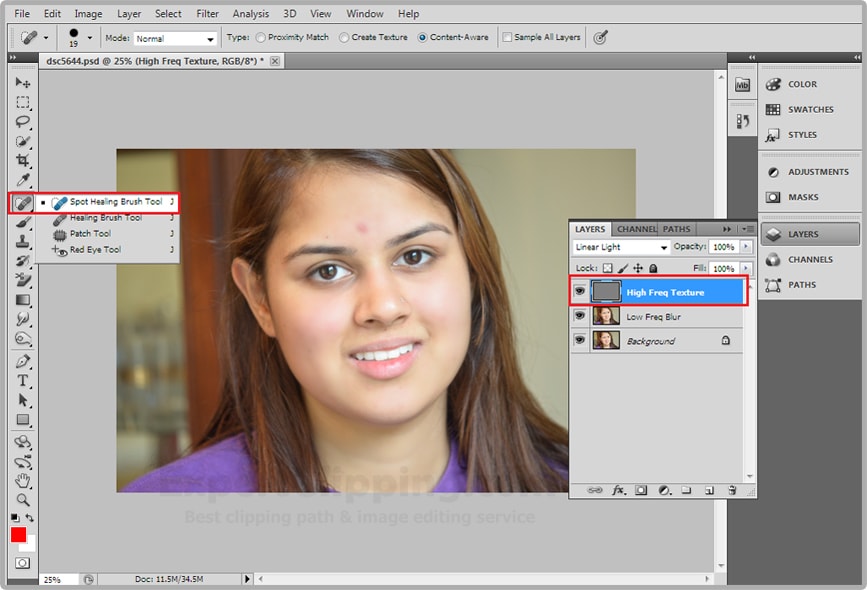
Make you brush bid larger than the spot your want to remove and simply click the brush over the spot. Continue to click or brush over other tiny, texture imperfections until the entire face is flawless.
Thanks for seeing it. I’ll show you another tutorial in my next lesson on adobe Photoshop you’re invited to see it
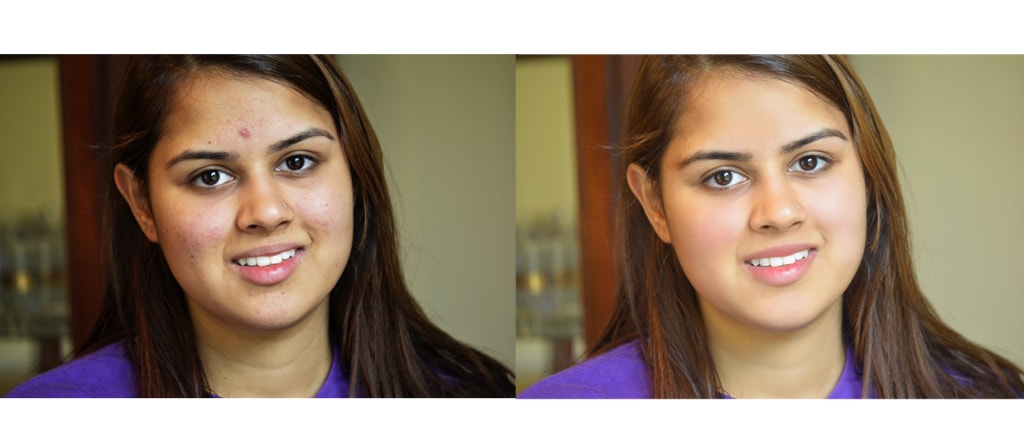
Photo Retouching is an excellent technique that helps you to touch specific and undesirable factor into your image. You can easily adjust any object or element and even a human figure or all forms of surplus elements neatly using the Photoshop pen tool with Clipping Path service as the term clearly dictates its function. Overall progress has done, but Photo Retouching is the final step to enhancing the image or image frame greater than normal one.
Expert Clipping is one of the best image editing company & photo editing services which has a large number of professional image editors working specially for it. These image editors have been selected after examining a lot of different images edited by them and it has been noticed that Image background removing is one of those areas in which these professional image editors of Expert Clipping are extremely good. As it has already been told that Image background removing is not an easy work to do but in fact it is a very complicated process which involves a great attention and concentration along with a great experience.
Join our Facebook, Youtube, Google+, Twitter page to learn more video


Leave a Reply
Want to join the discussion?Feel free to contribute!