How To Quickly Create Stylish Pop Art Portraits From Images In Photoshop
How To Quickly Create Stylish Pop Art Portraits From Images In Photoshop
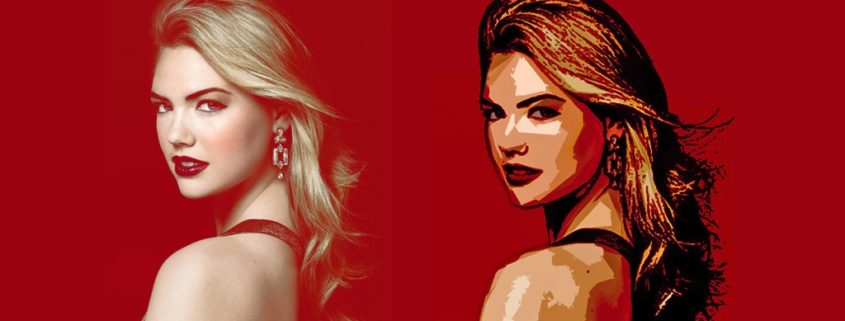
Today i’m going to show you how to easily create pop art portraits from photos, open a photo you like to use.
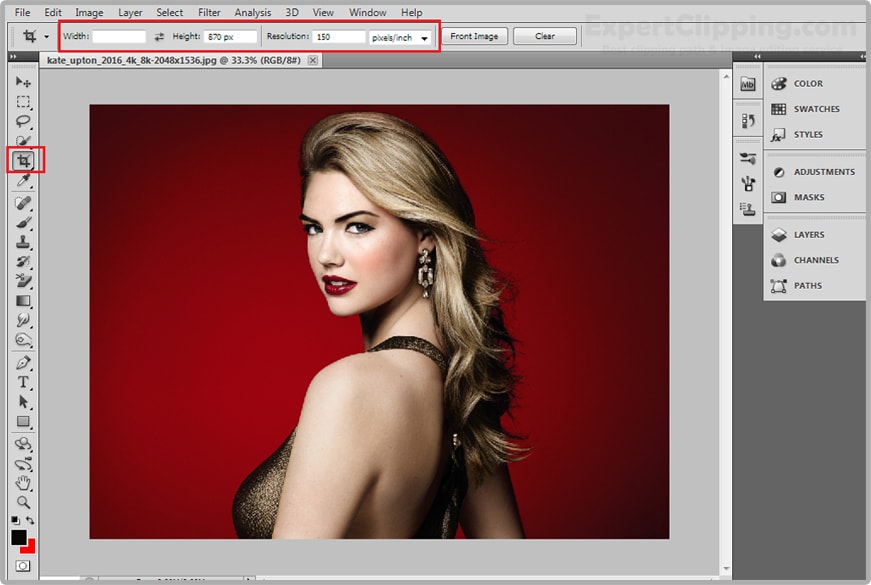
The first step is to crop your image, Open your crop tool and delete the amount in the width field. Keep it empty for the height, type 870 pixel and for the resolution, type in 150 pixels per inch.
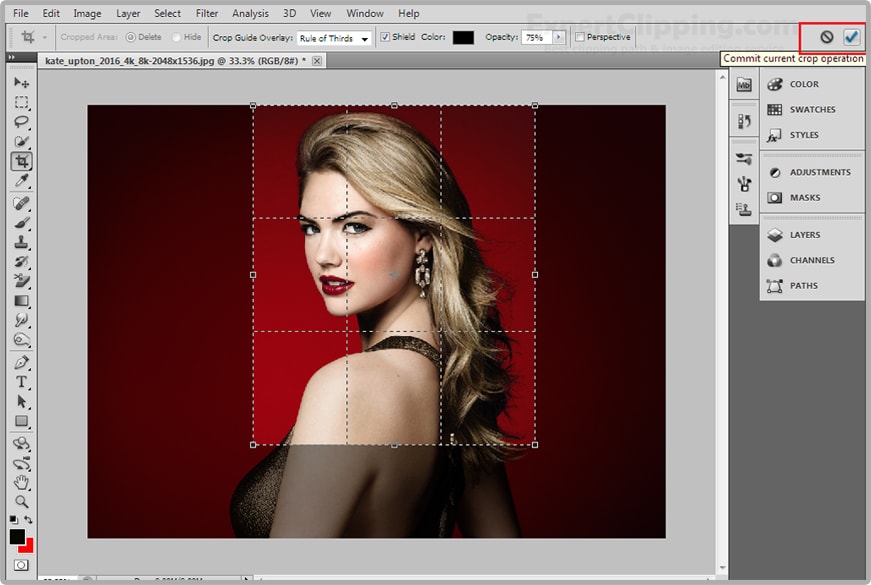
Drag any of the crop boundaries in or out to crop your image. Then click the check mark at the top. Or press enter .
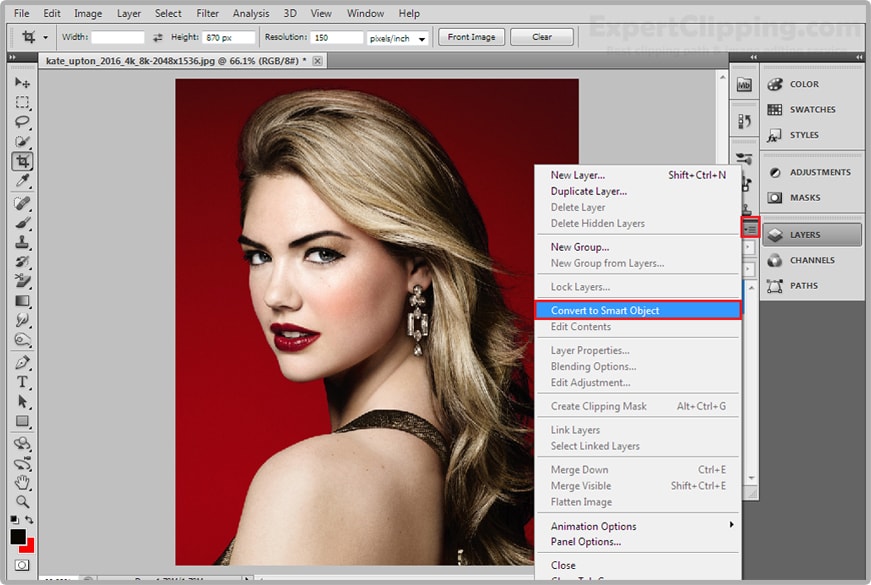
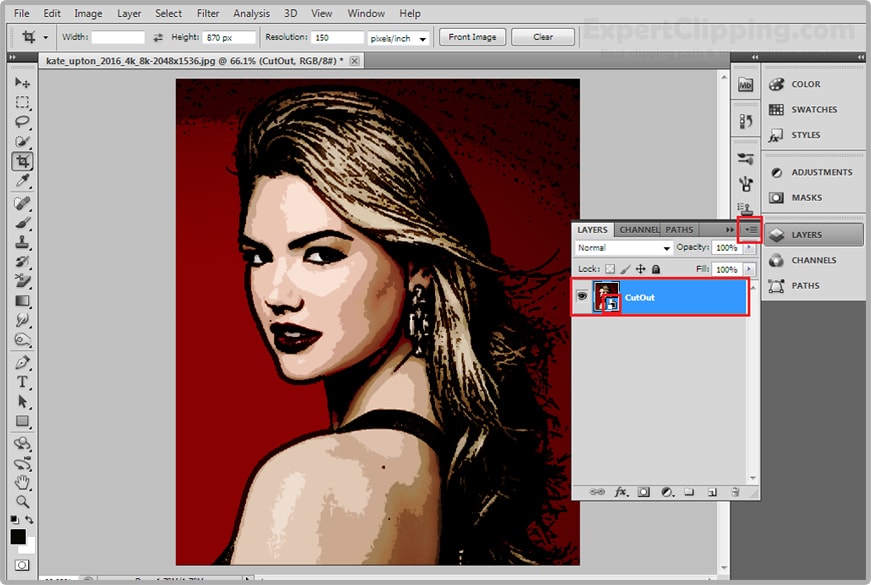
Next you convert your image into a Smart Object, so you can modify it non-destructively as well as allow you to change or adjust all the filter that you’ll be adding to it. Click the icon at the upper, right up the Layers panel and click “Convert to smart Object”.
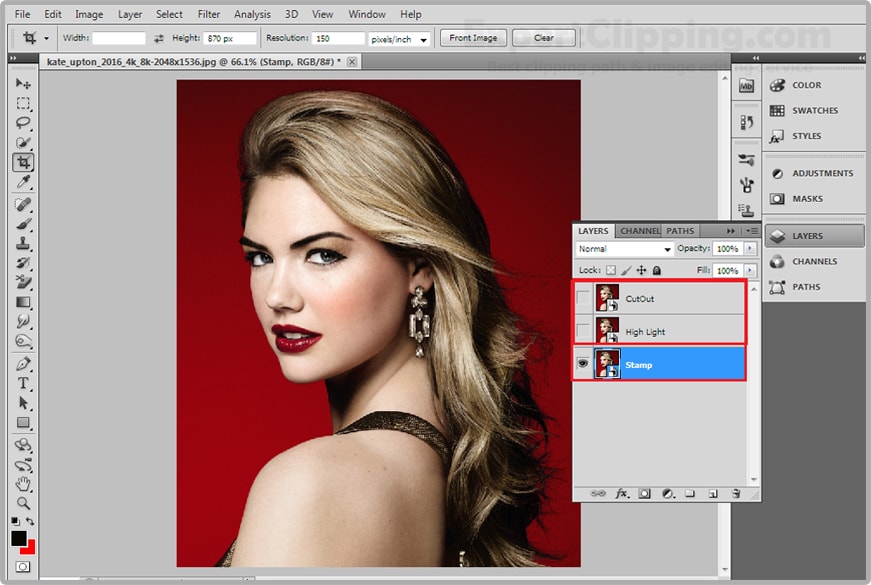
Make 2 copies of the layer by pressing ctrl+j twice. Name the top layer “cutout” next layer “Hard Light” and the bottom layer “Stamp” Click the eyeball icons of the top two layer to temporarily hide them.
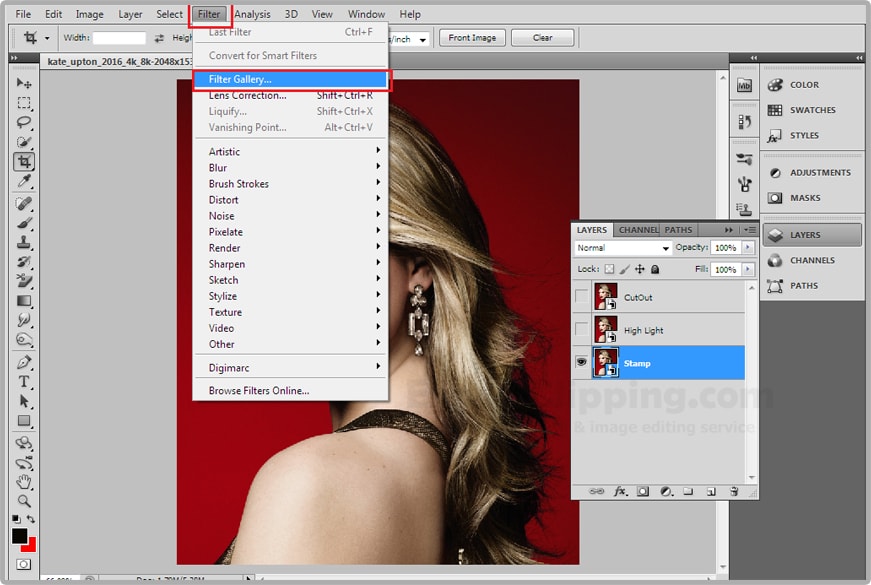
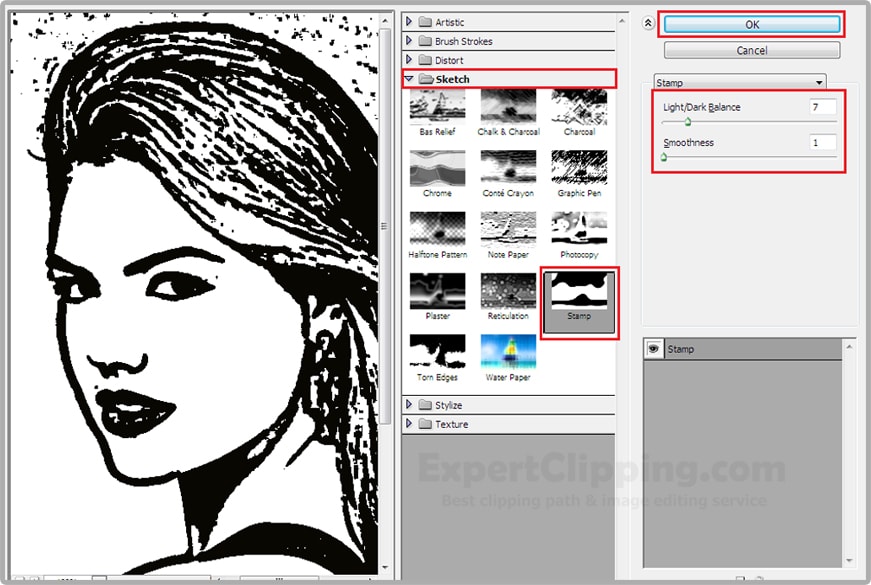
Go to filter and Filter Gallery. Open the Sketch Folder and click stamp. For this example I’ll make the “Light/Dark Balance” 7 and “Smoothness” 1 however, feel free to adjust this amount. Remember because your image is smart object, you can change or adjust the filter at any time.
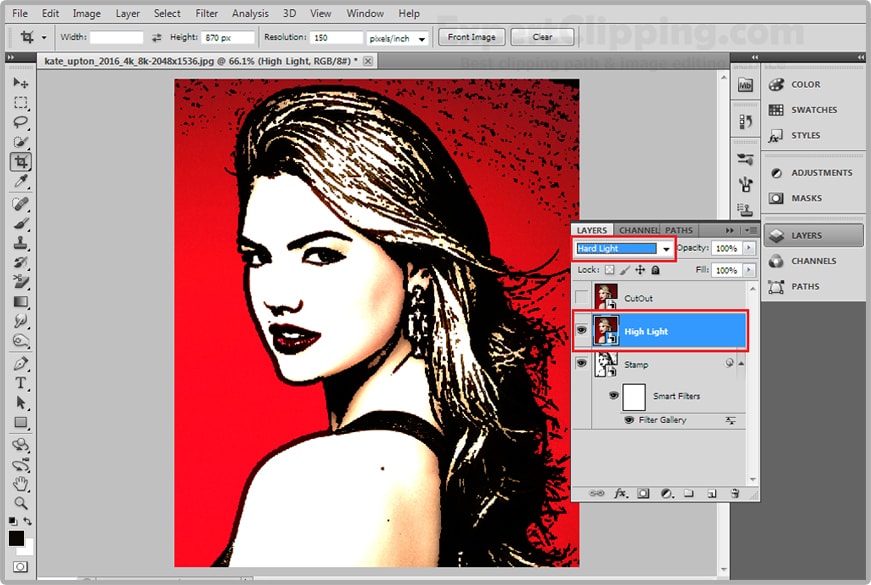
Make the middle layer visible and active. Change its blend mode to “Hard Light”
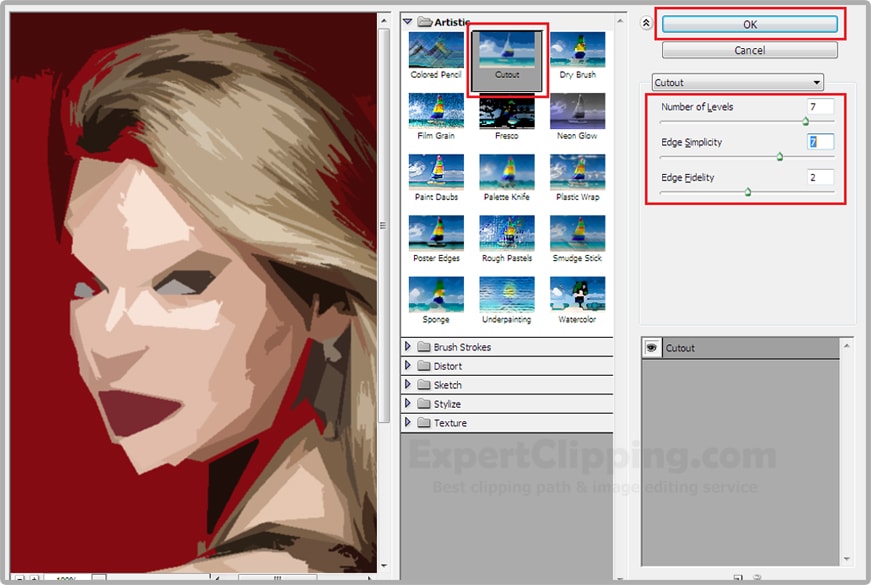
Make the top layer visible and active. Go back to “Filter” and “Filter Gallery” . Close the Sketch Folder and open the “Artistic” folder. Click “CutOut” I’ll make the Number of Levels: 7 Edge Simplicity: 7 and the Edge Fidelity: 2 then click OK.
Change its blend mode to multiply. To change the shapes of the colors and theirs amount, double click the “Filter Gallery” in the top layer to open back up the “Cut Out” Filter. Have fun experimenting with the amount.

If your image is too dark, as this example, to lighten it Shift-click the bottom layer to make all the layers active and merge them into a smart object.
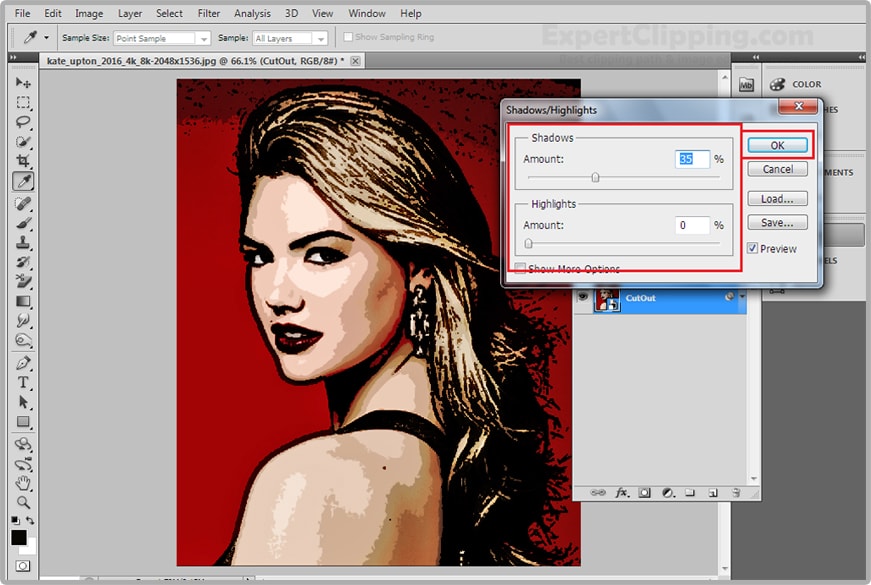
Go to image, Adjustment and “Shadows/Highlight” the shadows amount default 35%, however, feel free to adjust this amount then click ok.

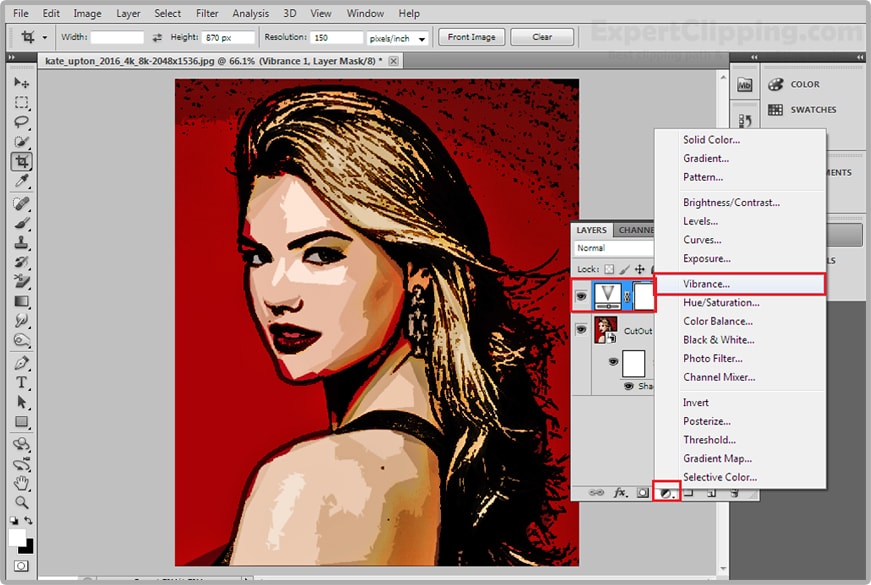
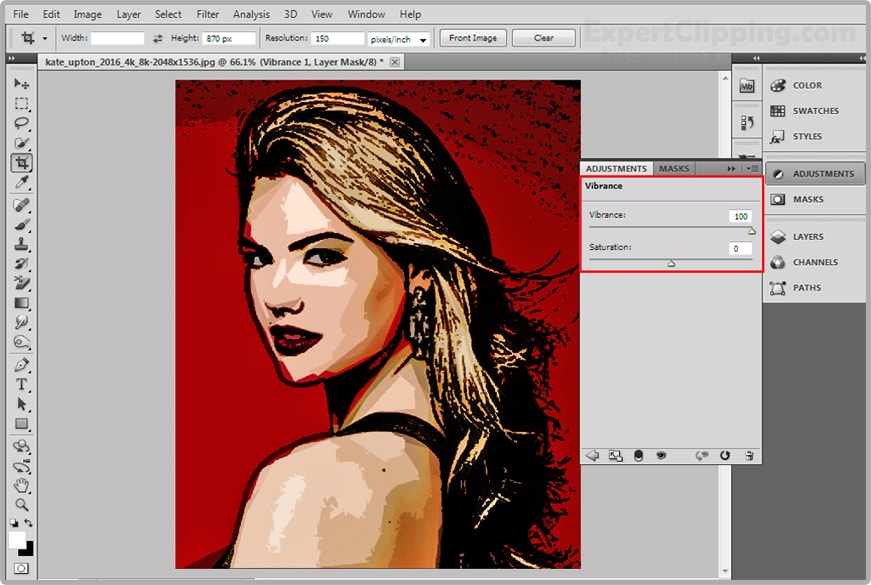
To increase the colors vibrancy, click the adjustment layer icon and click “Vibrance” I’ll drag the vibrance all the way to the right.
Using this technique you can create your photo stylish and pop art portraits.
Please Like Us, Comment And Share This
If You Have Any Question About This Please Comment.
We offer our services in every aspect of editing the photos such as Removing Backgrounds, Photo Retouching, Enhancing the Photo,Photo Restoration, Photo Processing, Amazon Photo editing services, Clipping Path services, Photo Collage,Masking, Cropping, Resizing Jewelry retouching, Raw/Jpg color correction and a lot more. In short, we offer any kind of services related to photo editing which you are looking for. The expert and highly professional team of Expert Clipping is confident in saying that we will shape your photo according to your imagination and we will provide you any kind of photo editing service.
Join our Facebook, Youtube, Google+, Twitter page to learn more video



Leave a Reply
Want to join the discussion?Feel free to contribute!