How To Colorize Black and White Image In Photoshop
How To Colorize Black and White Image In Photoshop
Today I’m going to show you best way to colorize black and white image in Photoshop easily.
Open a black and white photo you like to use for this project. First we’re going to isolate areas of your subject by making selections around those areas there are many ways to make selections however i’ll use the quick selection tools.
I’ll start by isolating the background from my subject by dragging my tool over my subject to select it, to remove areas of the selections press and hold alt key as you drag over those areas continue to drag your tool of your subject until it’s all selected.
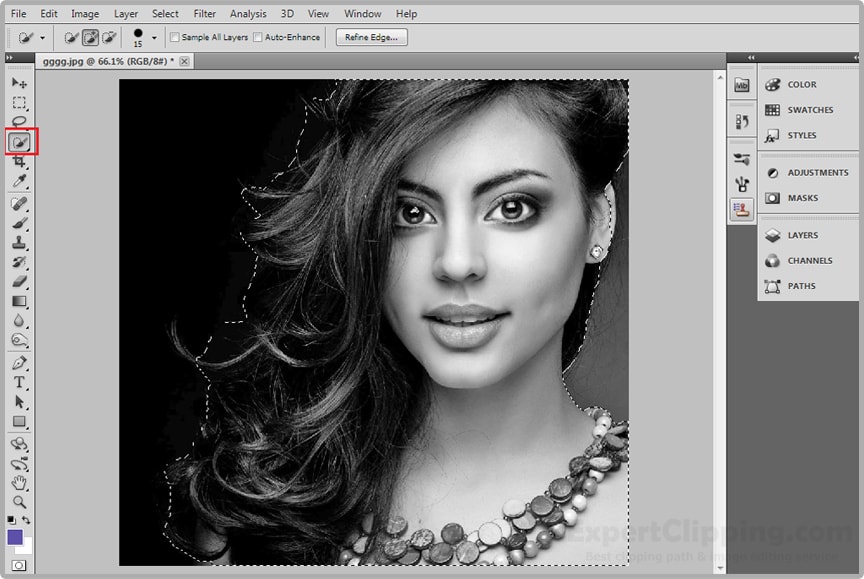
To check your selection press Q to make into a quick mask, then press Q again to revert it back into a selection.
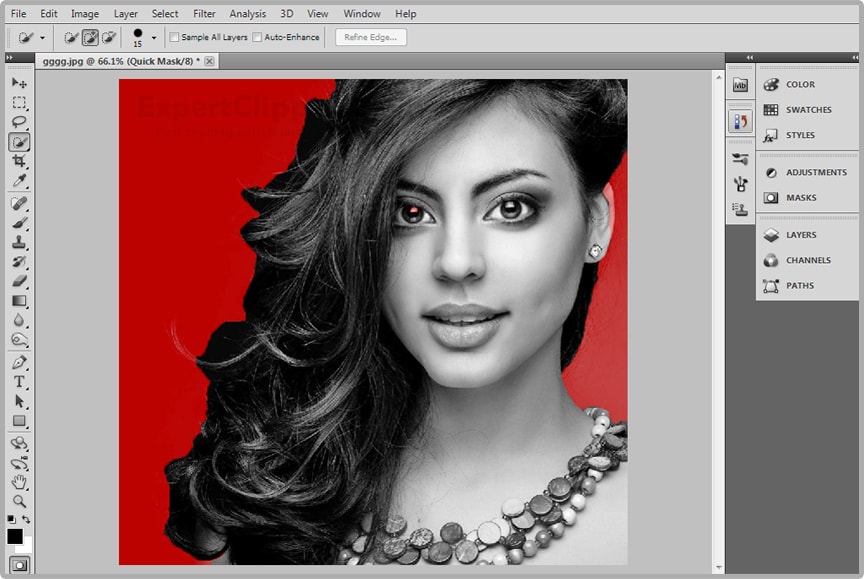
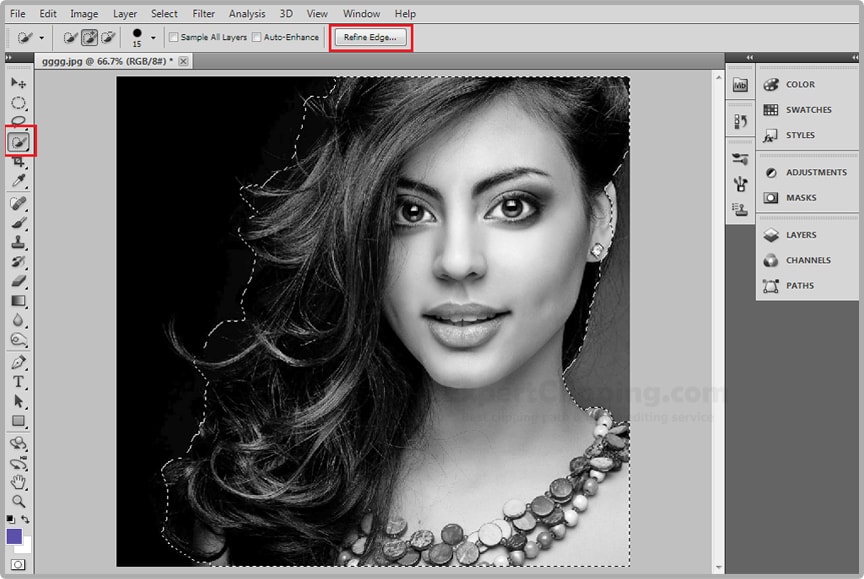
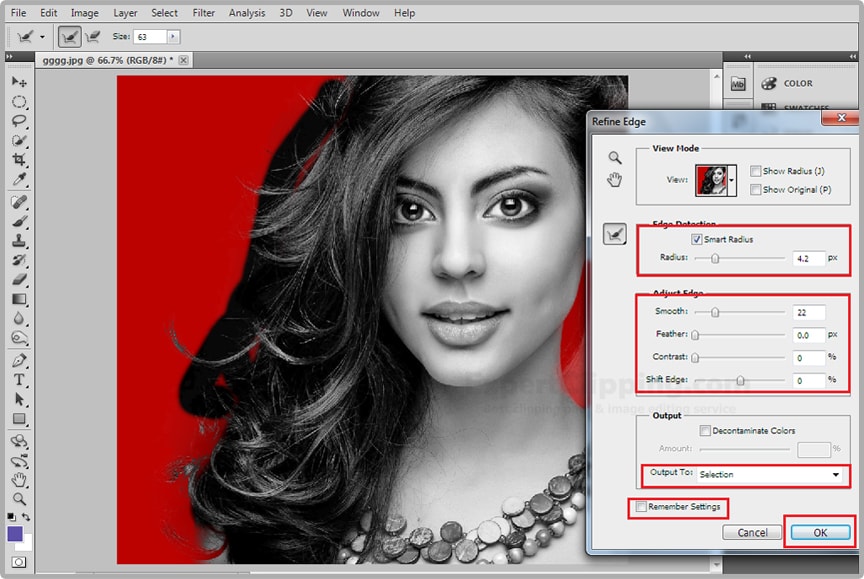
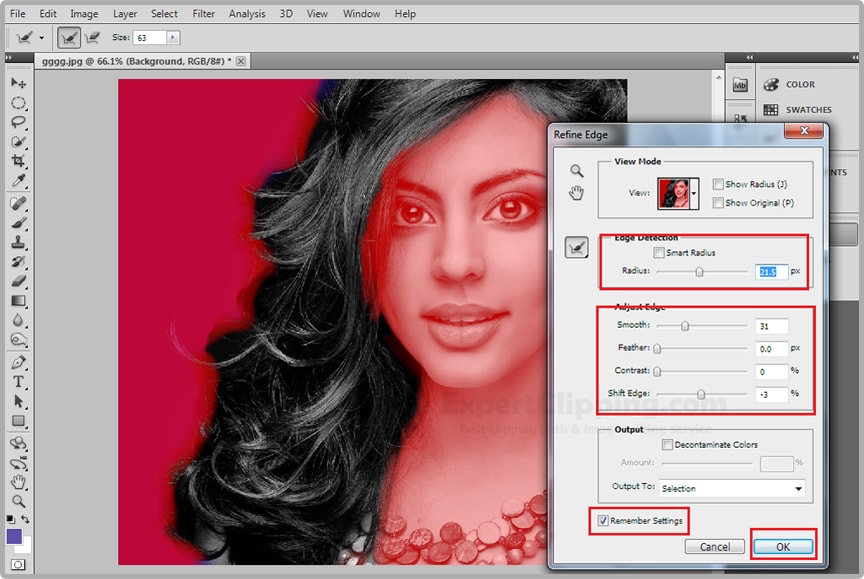
Then go to Refine Edge, Check Smart radius, drag the radius to the right a bid as well as smooth to make your tool bigger or smaller you can adjust it top of the brush size. Drag your tool over the edges of your subject where you’d like to refine the quick mask then click Ok. Press ctrl or command shift I to invert the selection.
Click the adjustment layer icon and click solid color. Instantly the selection became the shape inside the layer mask of solid color pick the color you want for your background once you rick your color click ok.
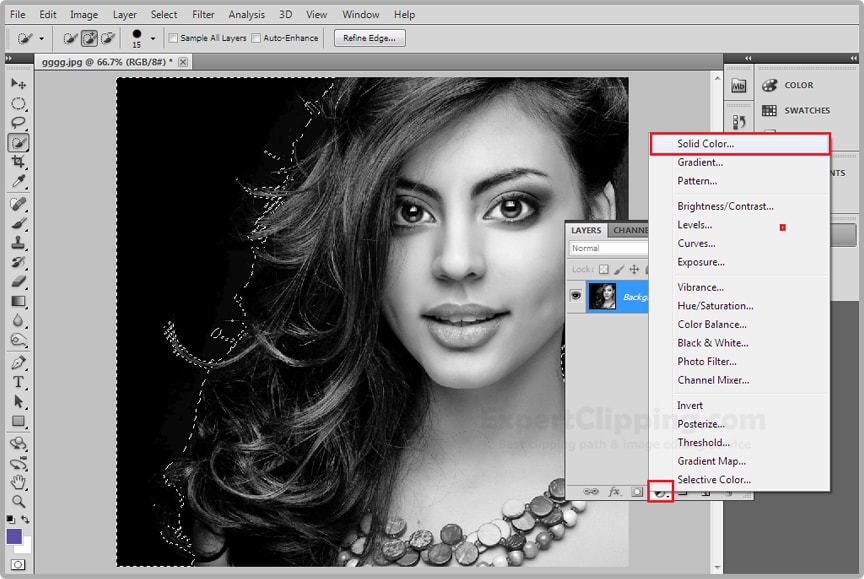
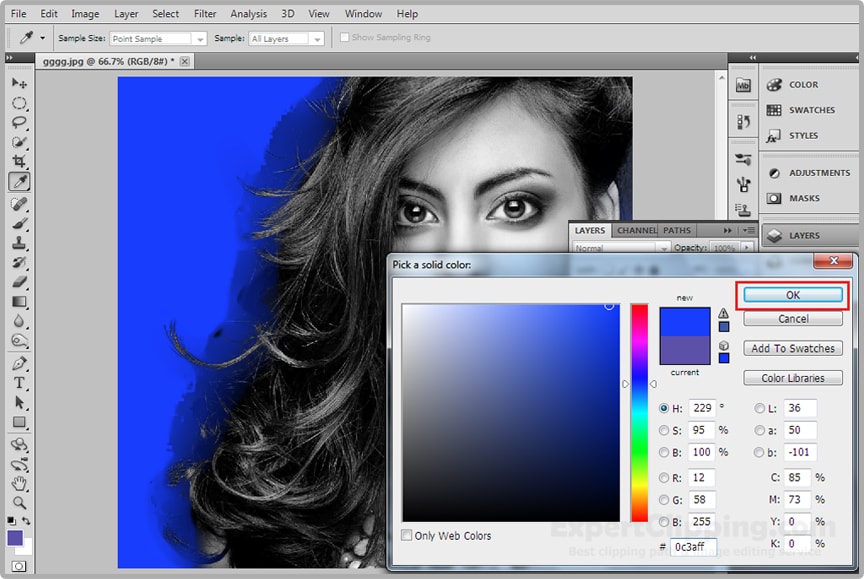
Change the blend mode to multiply reduce it’s opacity to a map looks good to you.
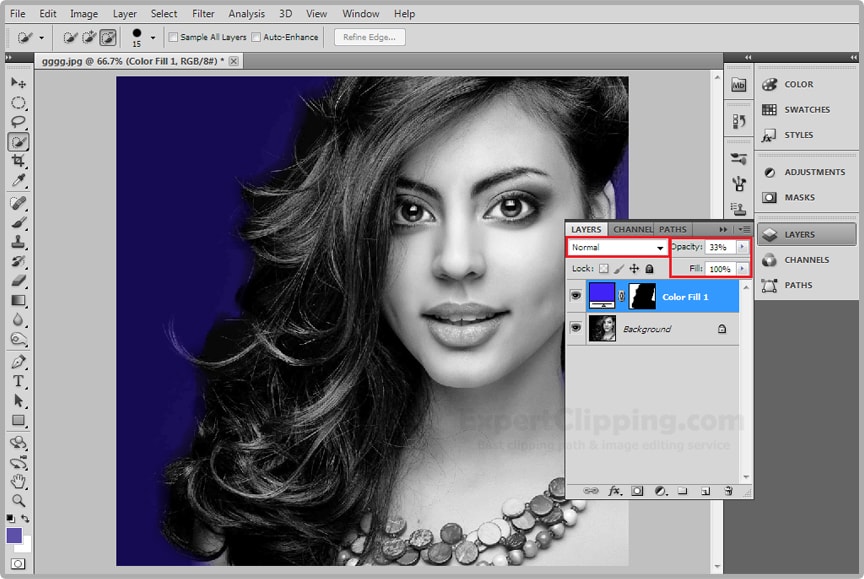
Make your photo active and drag the quick selection tool over another part of your selection i’m selecting the hair. Click the refine edge and check smart radius drag to the radius to right a bit as well as smooth.
Click the adjustment layer icon again and as before click solid color once again your new selection became the shape inside the layer mask and choose the color and click ok. This time change the blend mode to color then reduce it’s opacity to a map that looks good to you
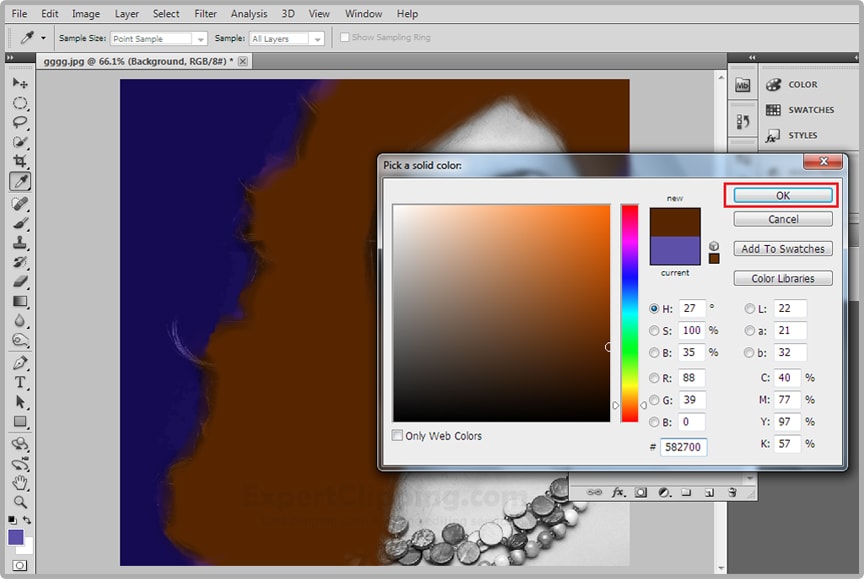
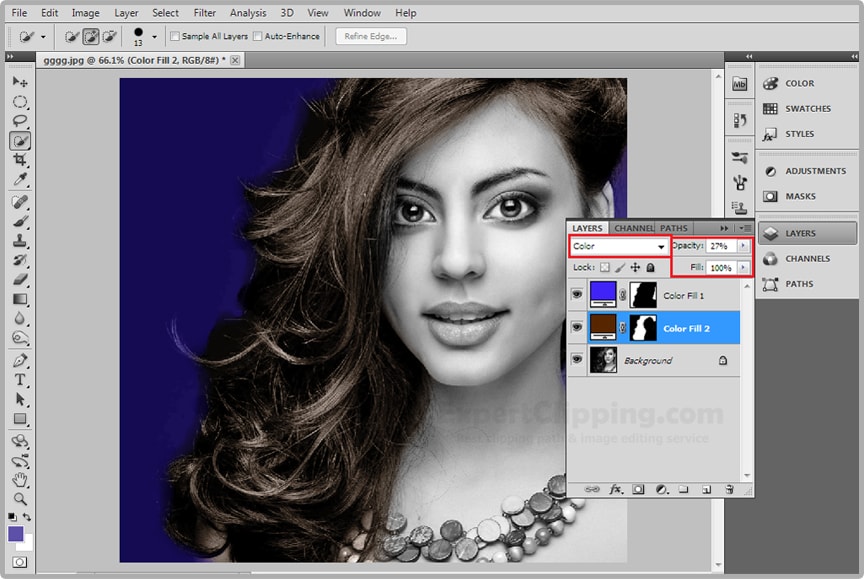
To colorize another area of your subject make your subject active and drag your quick selection tool over that area open refine edge if you check remember setting just click ok, repeat the same steps as you did earlier by clicking the adjustment layer icon and checking solid color pick a color and ok change it’s blend mode overlay or color depending on which looks better to you. Then reduce it’s opacity.
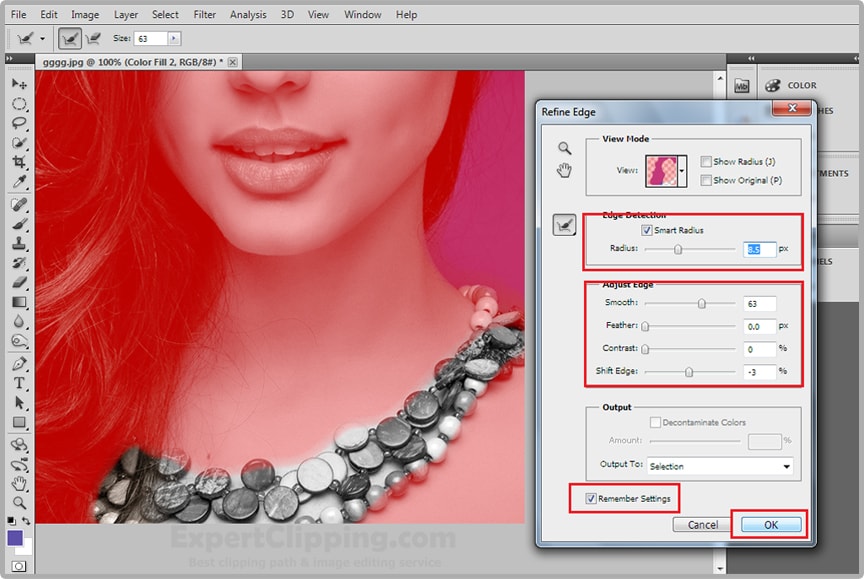
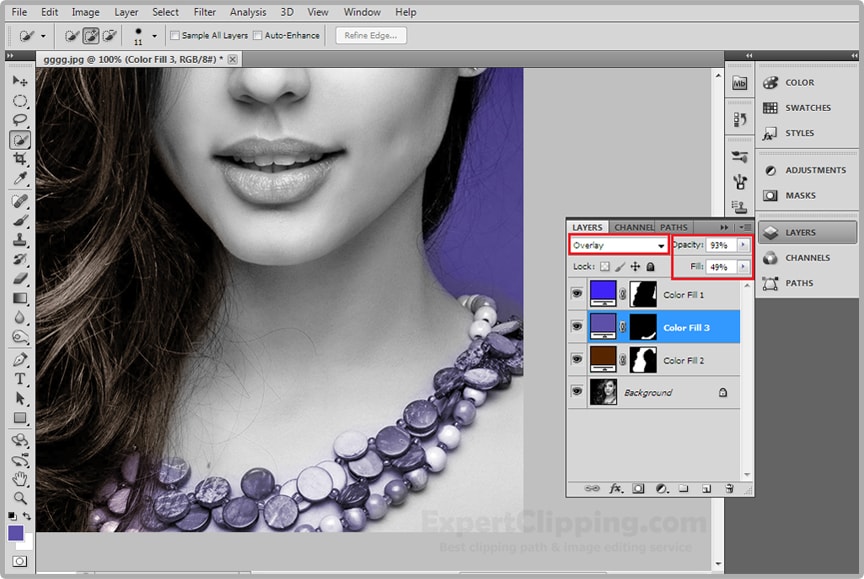
Continue to repeat these steps for all other areas you going to colorize.
To enhance an area with soft airbrush color will make a composite snapshot of our image first scroll to the top of your layers panel make the top layer active and press Ctrl+Shift+Alt+E.
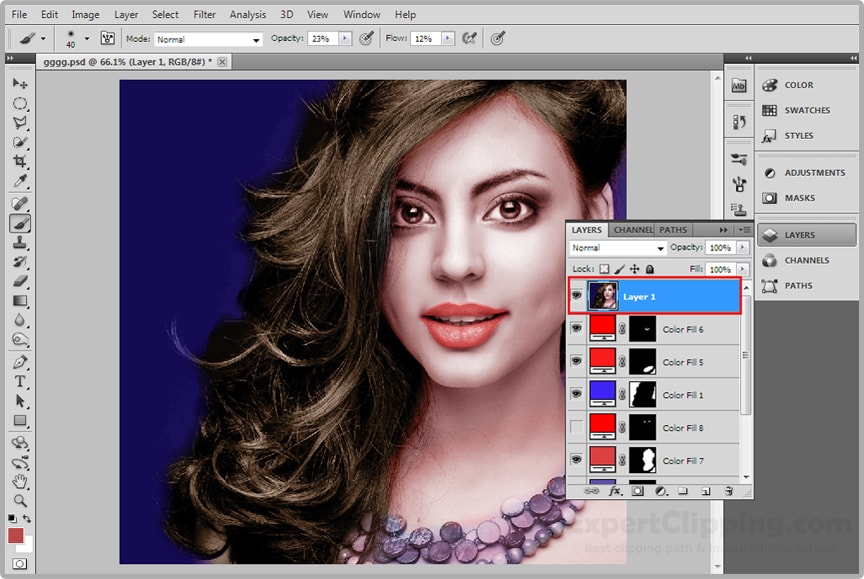
open your brush tool and brush picker we’ll adjust the brush size make your hardness 0% the opacity 33% and change it’s blend mode to color. Click your foreground color and pick a color you want to brush in. then gently brush in the color.
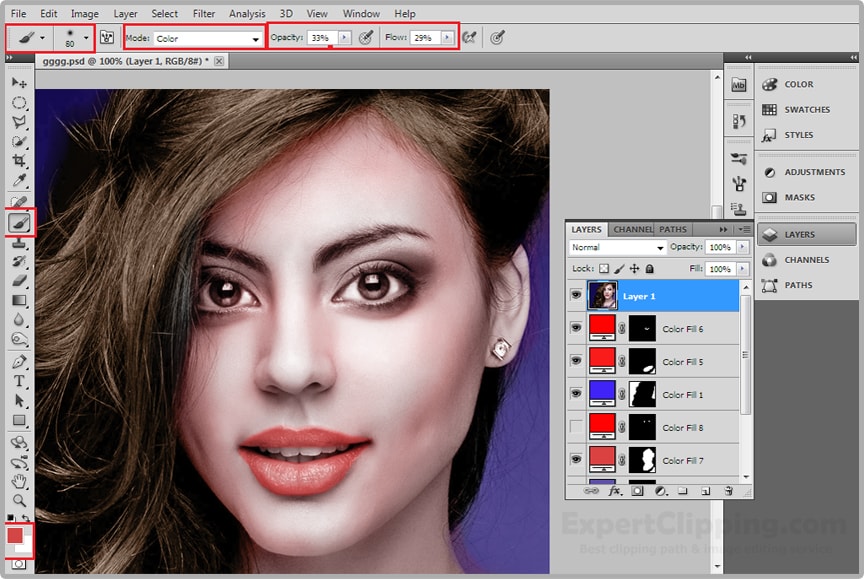
To pick another color to click foreground color to pick another color. And then Layer> Flatten Image
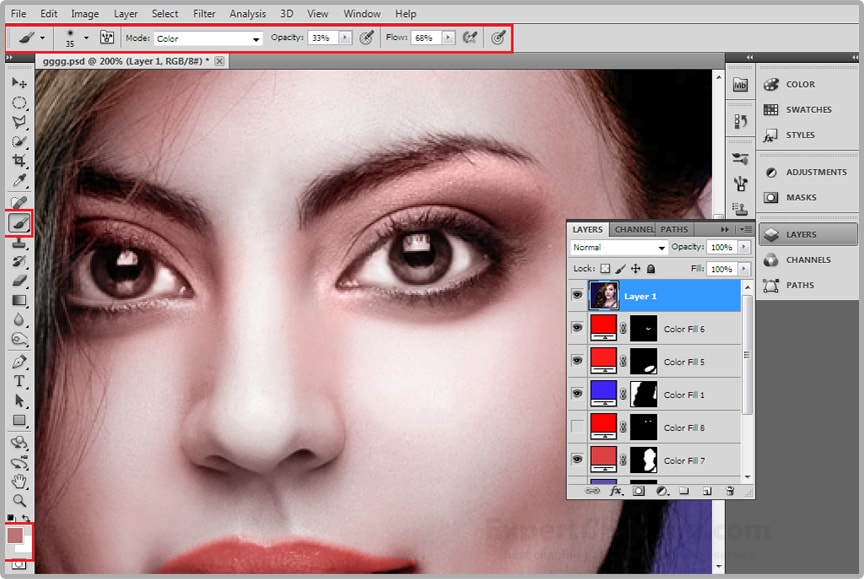
Now you successfully colorized a black and white image..
If You Have Any Question About This Please Comment.
We offer our services in every aspect of editing the photos such as Removing Backgrounds, Photo Retouching, Enhancing the Photo,Photo Restoration, Photo Processing, Amazon Photo editing services, Clipping Path services, Photo Collage,Masking, Cropping, Resizing Jewelry retouching, Raw/Jpg color correction and a lot more. In short, we offer any kind of services related to photo editing which you are looking for. The expert and highly professional team of Expert Clipping is confident in saying that we will shape your photo according to your imagination and we will provide you any kind of photo editing service.
Join our Facebook, Youtube, Google+, Twitter page to learn more video


Leave a Reply
Want to join the discussion?Feel free to contribute!